

The application to Calicut University requires successful submission of certain documents. Many applicants face difficulties uploading their documents during the application process.
This article provides a step-by-step guide complete with screenshots and detailed instructions, in order to help the applicants navigate the documents upload section of Calicut University with ease.
Key Documents for Calicut University
The key documents required for Calicut University admission process are as follow:
- Recent passport-size photograph (JPEG format)
- Signature (JPEG format)
- SSLC/10th certificate (for date of birth verification)
- 12th mark sheet (for UG admission)
- UG degree certificate and mark lists (for PG admission)
- Transfer Certificate (TC)
- Community/Caste certificate (if applicable)
- EWS/BPL certificate (if applicable)
- PwD Certificate (if applicable)
All these documents need to be scanned properly and must be under 500 KB in size.
Step-by-Step Guide to Uploading Documents on Calicut University Portal
A step-by-step guide to uploading documents on Calicut University portal is given below:
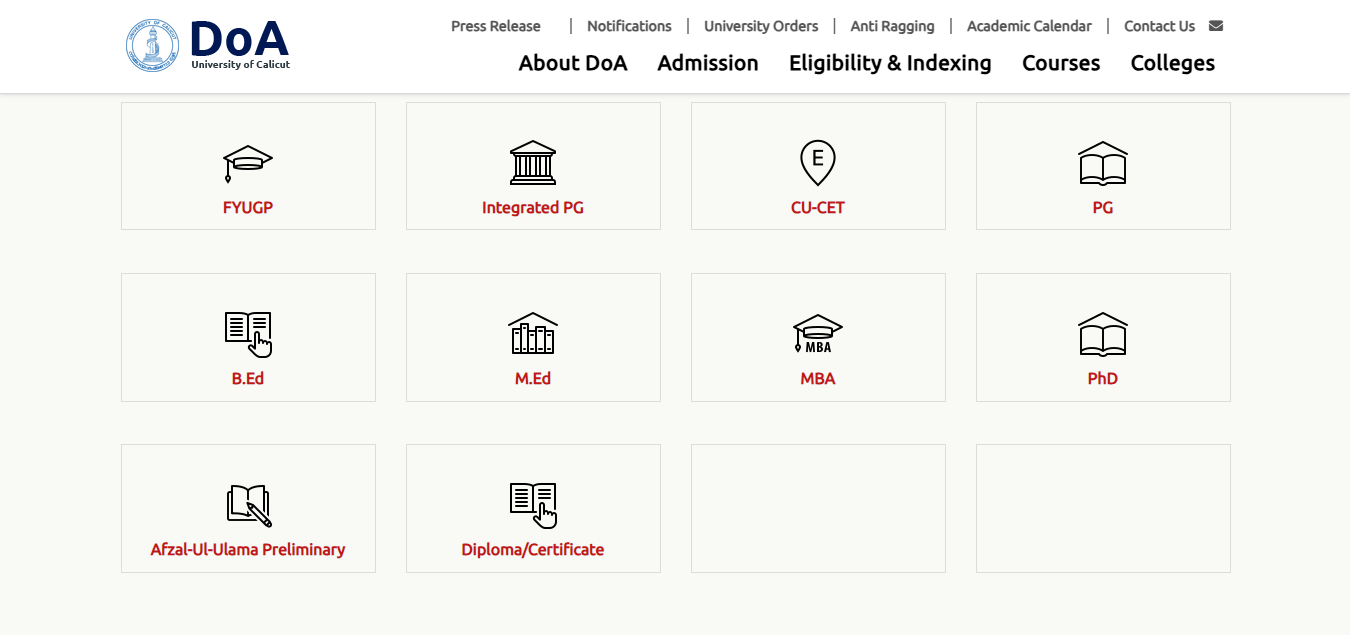
Step 1: Visit the Official Admission Portal
Go to the Calicut University Admission Portal. The applicants will see the homepage for admissions.
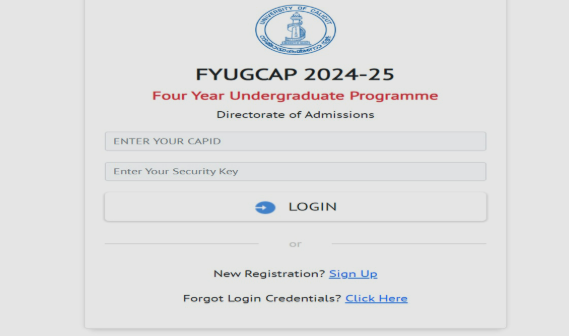
Step 2: Login in to the Candidate Profile
Click on the candidate login on the menu. Enter the CAP ID and Password that the applicant received after the registration process.
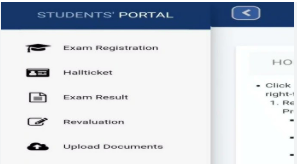
Step 3: Access the Document Upload Section
After logging in the applicant will be directed to the dashboard. Click on the document upload tab, on the left hand side panel.
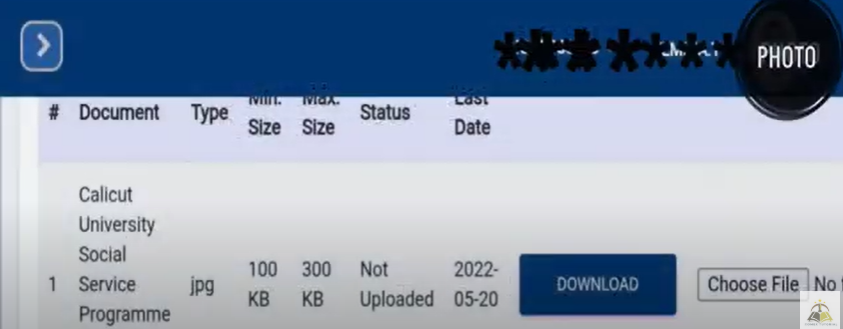
Step 4: Upload the Required Documents
After opening the document upload section the applicants will see a list of documents with corresponding upload buttons. Follow the following steps for uploading the documents:
- Click on Choose File, next to each document type.
- Select the relevant file from your device.
- Click upload.
Repeat this process for all the documents. Also ensure that file format is correct and file size is within the limits.
Step 5: Review the Documents
After uploading the documents, scroll down to preview the uploaded files. The applicants will see small thumbnails or file links. If something is incorrect or misplaced click remove or replace.
Step 6: Submit the Documents
After previewing the documents, click on the submit icon and submit the documents. After submitting the documents, the applicant will receive a pop up confirmation message.
Additional Tips
Additional tips have been provided which applicants should keep in mind when uploading the documents on Calicut University Portal:
Tip | Explanation |
Use a scanner app (like Adobe Scan or CamScanner) | To get clean, professional-looking documents. |
Rename files with clear names (e.g., 12th_marksheet.jpg, TC.pdf) | Before uploading for easy identification. |
Do not refresh the page during upload | To avoid errors. |
Use a laptop or desktop | For better interface access and fewer glitches. |
Useful Links
A few useful links which can help the applicants with their uploading the documents process on Calicut University Portal:
- https://admission.uoc.ac.in/
- Official Instructions PDF
Uploading the documents on the Calicut University portal is a straightforward process if the applicants follow the steps carefully. They should take time to double check file formats, size and clarity before submitting. This ensures that their application is processed smoothly without rejections and delays.
The applicants are advised to stay in touch with the current news regarding Calicut University and stay tuned through the official website https://uoc.ac.in/

